Firmware Upgrade
This tutorial applies to AnyShake Explorer E-C121G as well.
This tutorial will guide you through the process of upgrading the firmware on the AnyShake Explorer E-C111G.
Before Upgrading
The E-C111G is based on the ARM Cortex-M3 core. The upgrade process is usually done via an SWD interface. To upgrade the firmware, you need a debugger that supports SWD, such as ST-Link or J-Link.
In this tutorial, we use the official ST-Link V2 for demonstration purposes.
Third-party programmers that are compatible with ST-Link V2 are also supported. These alternatives are often more affordable and work reliably with AnyShake Explorer E-C111G.
Connect E-C111G SWD Interface to PC
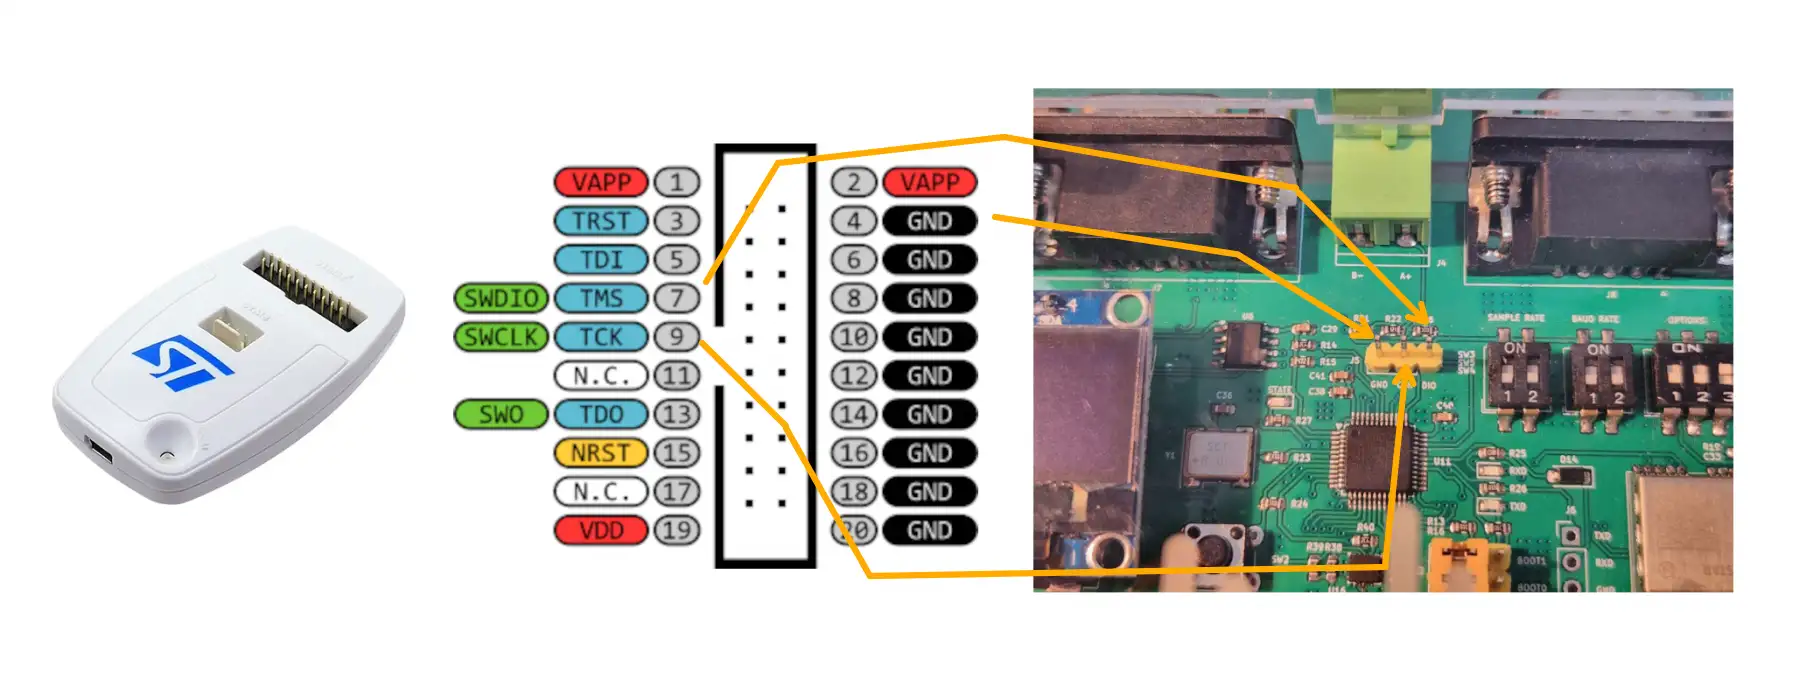
Dissamble the E-C111G enclosure and connect the SWD pins to your PC using ST-Link V2, connect the pins as follows:
| ST-Link V2 Pin | E-C111G Pin |
|---|---|
| Pin 4 (GND) | GND |
| Pin 7 (SWDIO) | DIO |
| Pin 9 (SWCLK) | CLK |
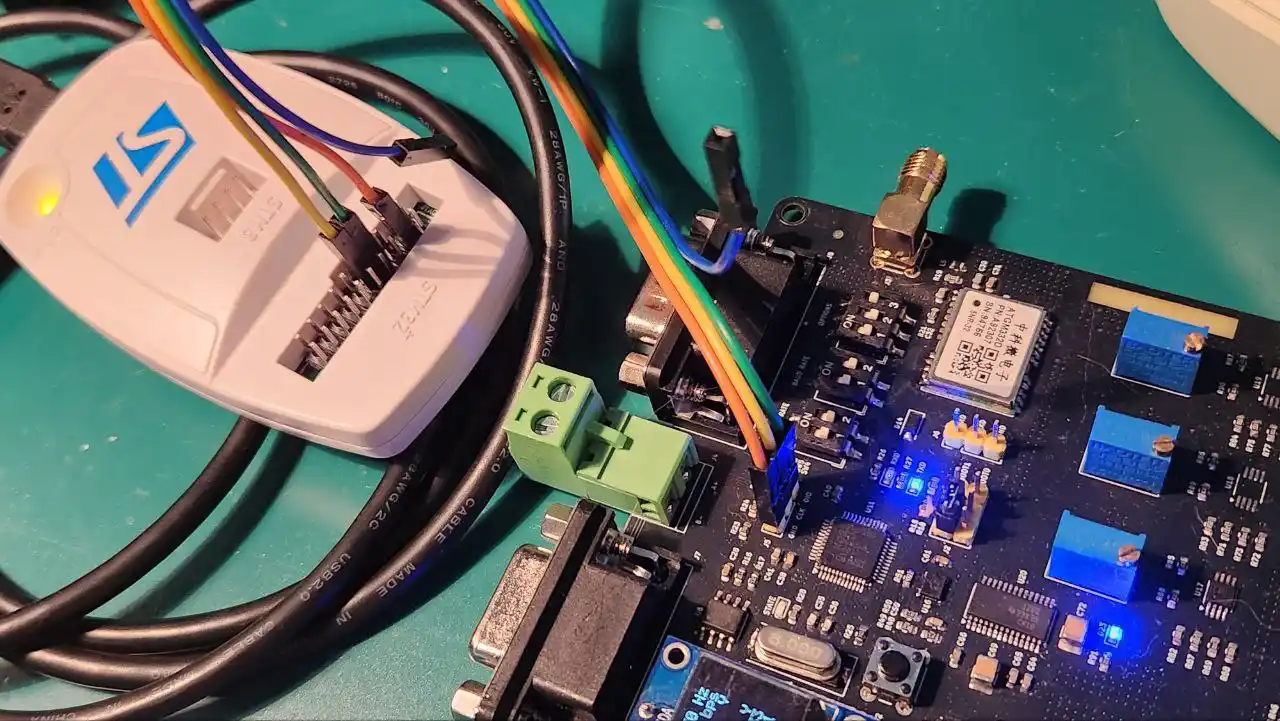
The SWD interface is not electrically isolated. Use caution when connecting to a powered system to avoid potential damage to your programmer or the device.
Install Driver for Programmer
On Linux systems, no additional driver installation is required. ST-Link programmers are supported through the standard libusb interface.
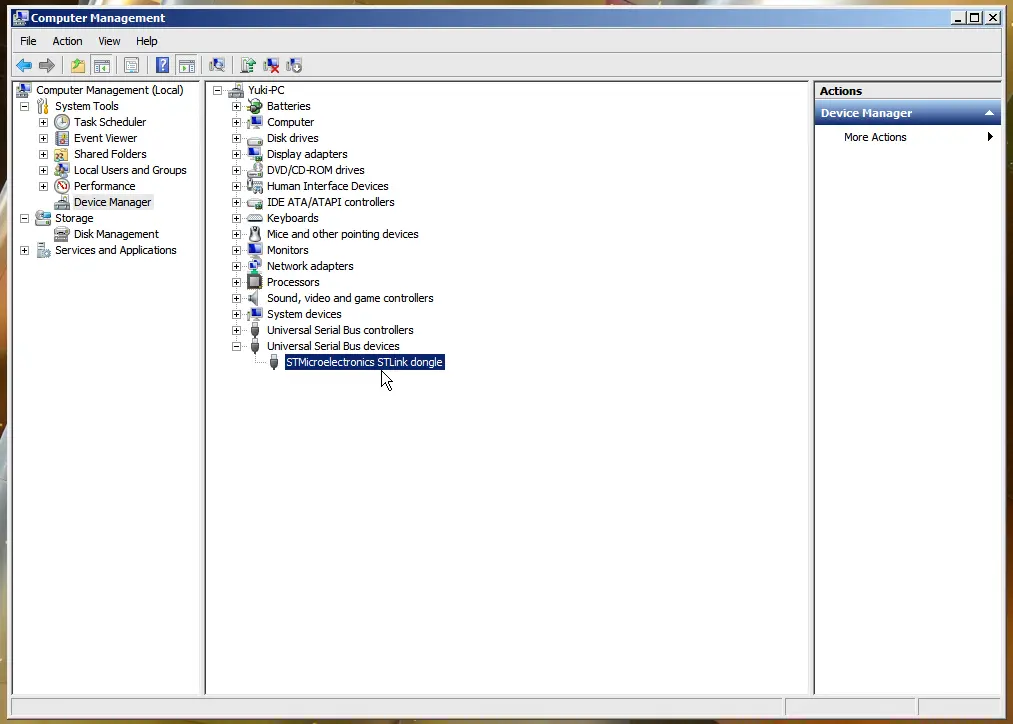
On Windows, you need to manually install the ST-Link USB driver. You can download the latest version from the STMicroelectronics website.
After installing the driver, open Device Manager and check under Universal Serial Bus Devices.
On Linux (e.g. Debian) systems, if you have stlink-tools package installed, you can use the st-info command to check if MCU is recognized by the programmer. For example:
$ st-info --probe
Typical output:
Found 1 stlink programmers
  version:    V2J29S7
  serial:     ************************
  flash:      131072 (pagesize: 1024)
  sram:       20480
  chipid:     0x410
  dev-type:   STM32F1xx_MD
With non-zero chipid and dev-type in the output, which indicates that the device has been successfully recognized by the programmer.
Setup PlatformIO
PlatformIO is an open-source embedded development environment used to build and upload firmware. To install PlatformIO, you need install Python and Visual Studio Code first.
After installing, you can open Visual Studio Code and click Extensions, search to install "PlatformIO" extension.
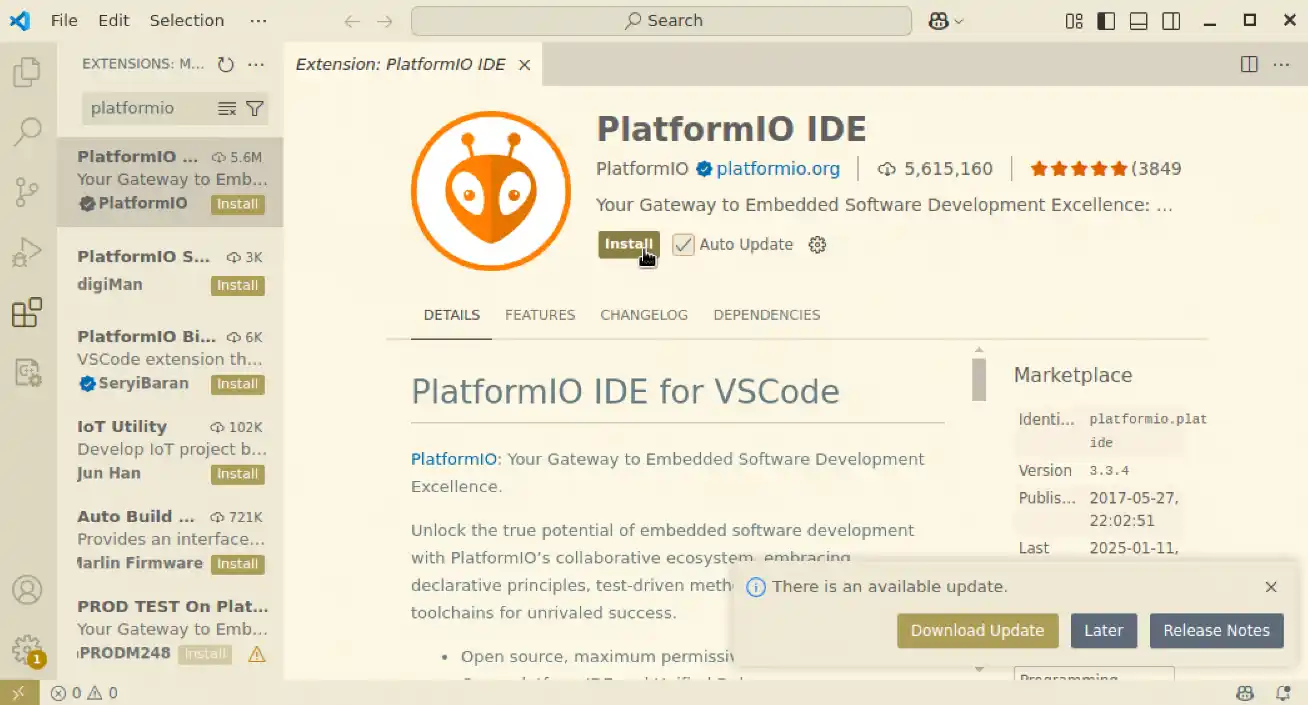
It usually takes a few minutes to install the extension. Restart Viaual Studio Code after PlatformIO installation for the extension to initialize properly.
Get Latest Firmware
The firmware source code for E-C111G is located in the default master branch of the AnyShake Explorer GitHub repository, under the firmware/ directory.
To get source files, you need to clone the repository and checkout the corresponding branch.
If you have git installed, you can use the following command to clone the repository:
$ git clone --depth 1 https://github.com/anyshake/explorer
Or get the latest project files using the following direct link, after downloading, extract the archive and locate the firmware directory.
- github.com/anyshake/explorer/archive/refs/heads/master.zip
- github.com/anyshake/explorer/archive/refs/heads/master.tar.gz
Open Firmware Project
- Press
Ctrl + K, O(orCmd + K, Oon macOS) - Select the
firmwarefolder inside the repository

You should see the platformio.ini file in the root of the project. PlatformIO will automatically initialize the environment.
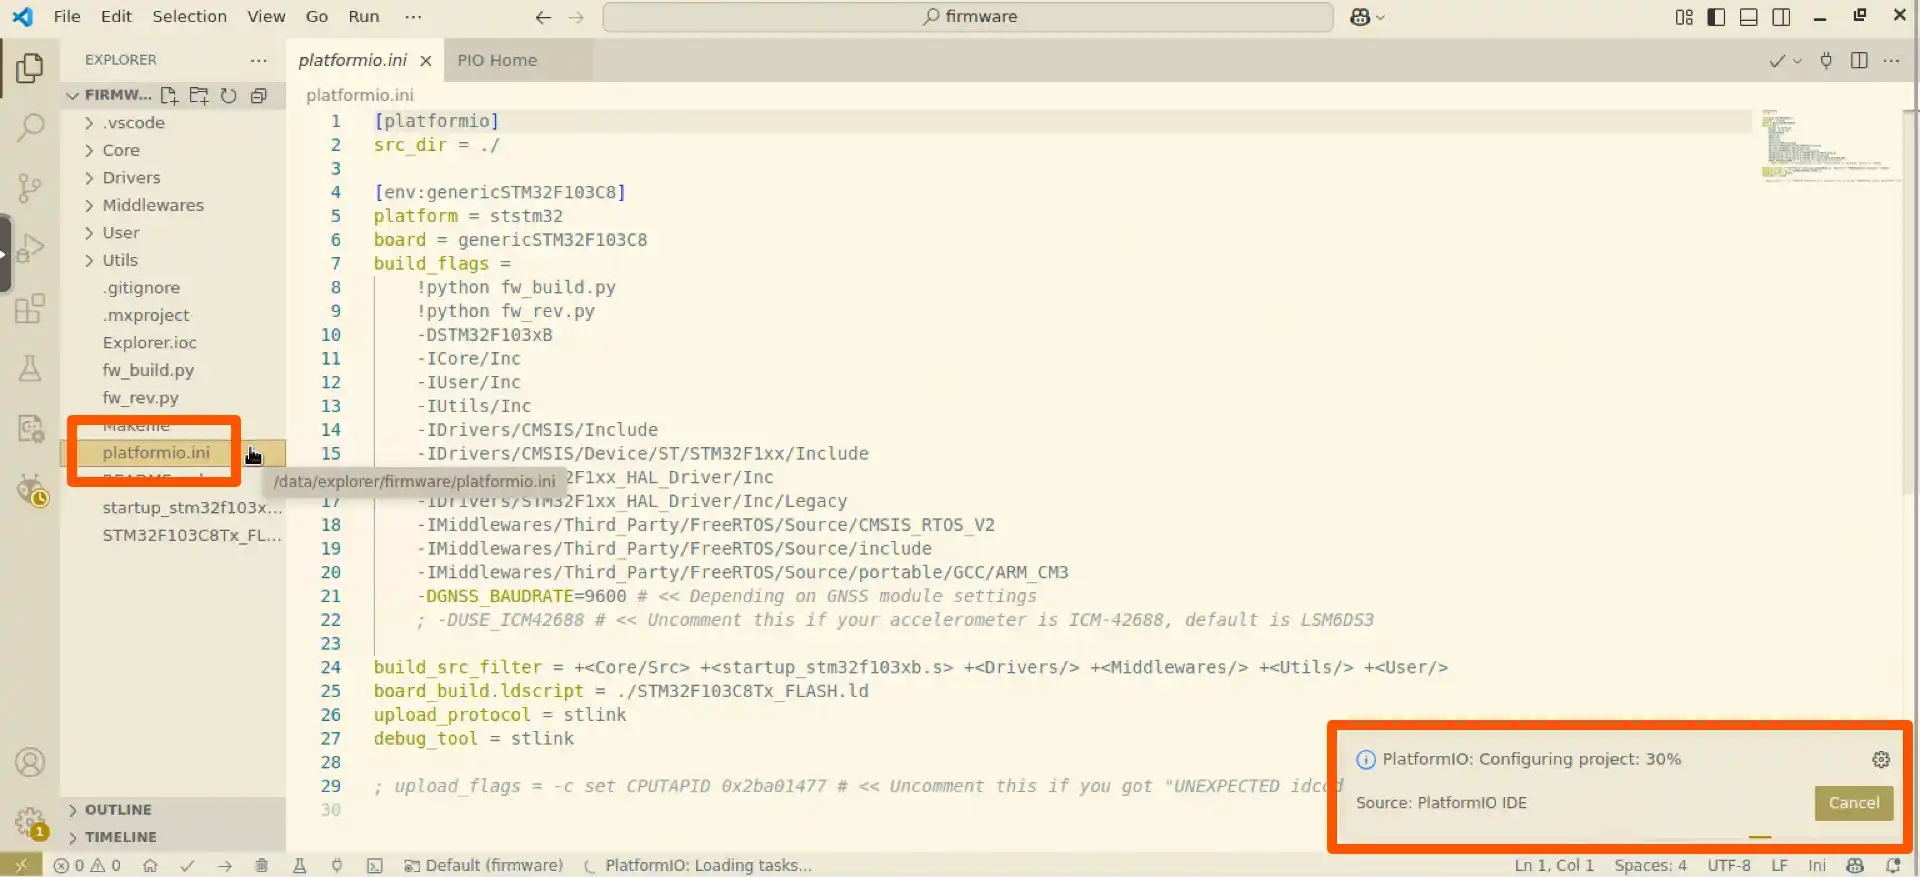
Customize Build Settings
Open the platformio.ini file and customize the settings according to your needs. There are a few options to customize:
GNSS_BAUDRATE
The GNSS_BAUDRATE macro controls the baud rate of the on-board GNSS module. By default, it is set to 9600, which is compatible with most GNSS modules. However, some modules may require a different baud rate for proper communication.
Below is a reference table listing common GNSS module models and their corresponding recommended baud rates:
| Manufacturer | Model | Baud Rate (bps) |
|---|---|---|
| ZHONGKEWEI | ATGM332D | 9600 |
| Allystar | TAU1114 | 9600 |
| Quectel | LC260Z | 115200 |
| u-blox | MAX-M10S-00B | 38400 |
GNSS_MODEL
The GNSS_MODEL macro controls the GNSS module that is used in the firmware. It can be set to one of the following values:
GENERIC: Generic GNSS module (for example, U-blox MAX-M10S-00B)QUECTEL_LC260Z: Quectel LC260Z GNSS moduleQUECTEL_LC261Z: Quectel LC261Z GNSS moduleQUECTEL_LC760Z: Quectel LC760Z GNSS moduleQUECTEL_LC761Z: Quectel LC761Z GNSS moduleZHONGKEWEI_ATGM332D: Zhongkewei ATGM332D GNSS moduleZHONGKEWEI_ATGM336H: Zhongkewei ATGM336H GNSS moduleQUECTEL_L26K: Quectel L26K GNSS moduleQUECTEL_L76K: Quectel L76K GNSS moduleALLYSTAR_TAU812S: Allystar TAU812S GNSS moduleALLYSTAR_TAU1113: Allystar TAU1113 GNSS moduleALYSTAR_TAU1114: Allystar TAU1114 GNSS module
DEVICE_MODEL
The DEVICE_MODEL macro specifies the target device model used by the firmware. Valid values are:
E-C111GE-C121G
HARDWARE_REV
The HARDWARE_REV macro specifies the hardware revision of the device.
It is represented as a date code corresponding to the current hardware revision and can be found printed on the front side of the PCB.
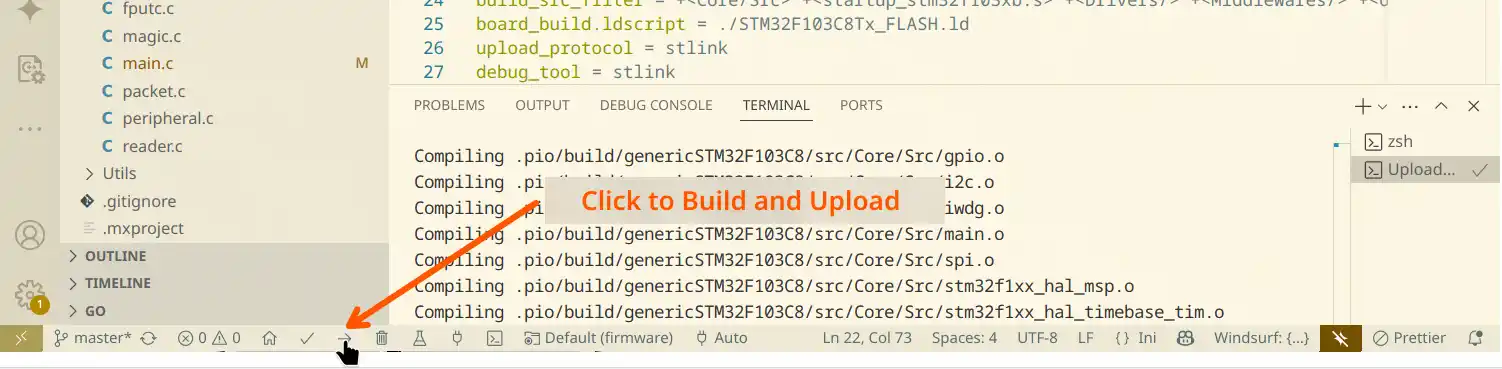
Build and Upload
Click the Upload button in the PlatformIO toolbar to compile and flash the firmware.
It usually takes a while to build firmware and upload to the device. If successful, you’ll see a confirmation message:
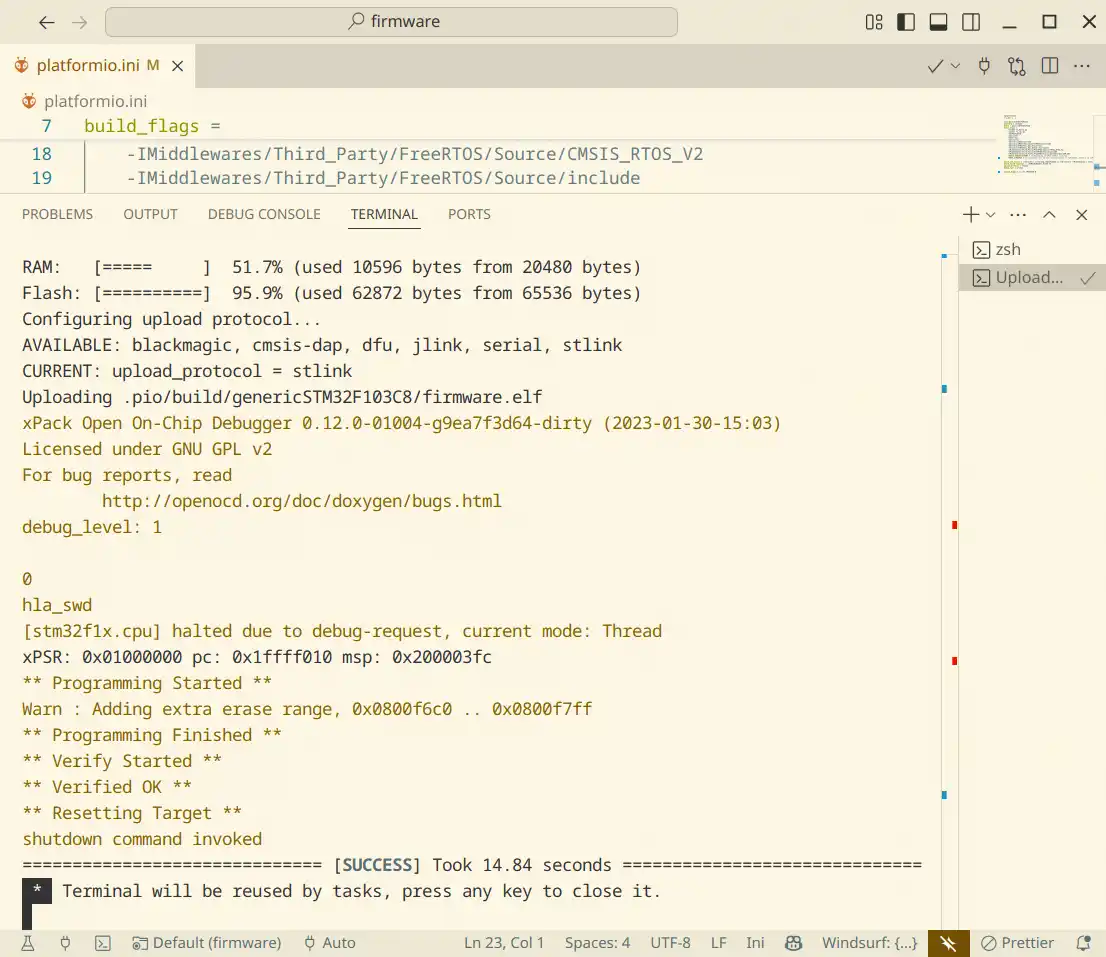
After Flashing
Remove the programmer from the E-C111G and reset the device by pressing the RESET button.
Your device is now running the updated firmware and ready for use!