Firmware Upgrade
This tutorial will guide you through the process of upgrading the firmware on the AnyShake Explorer E-D001.
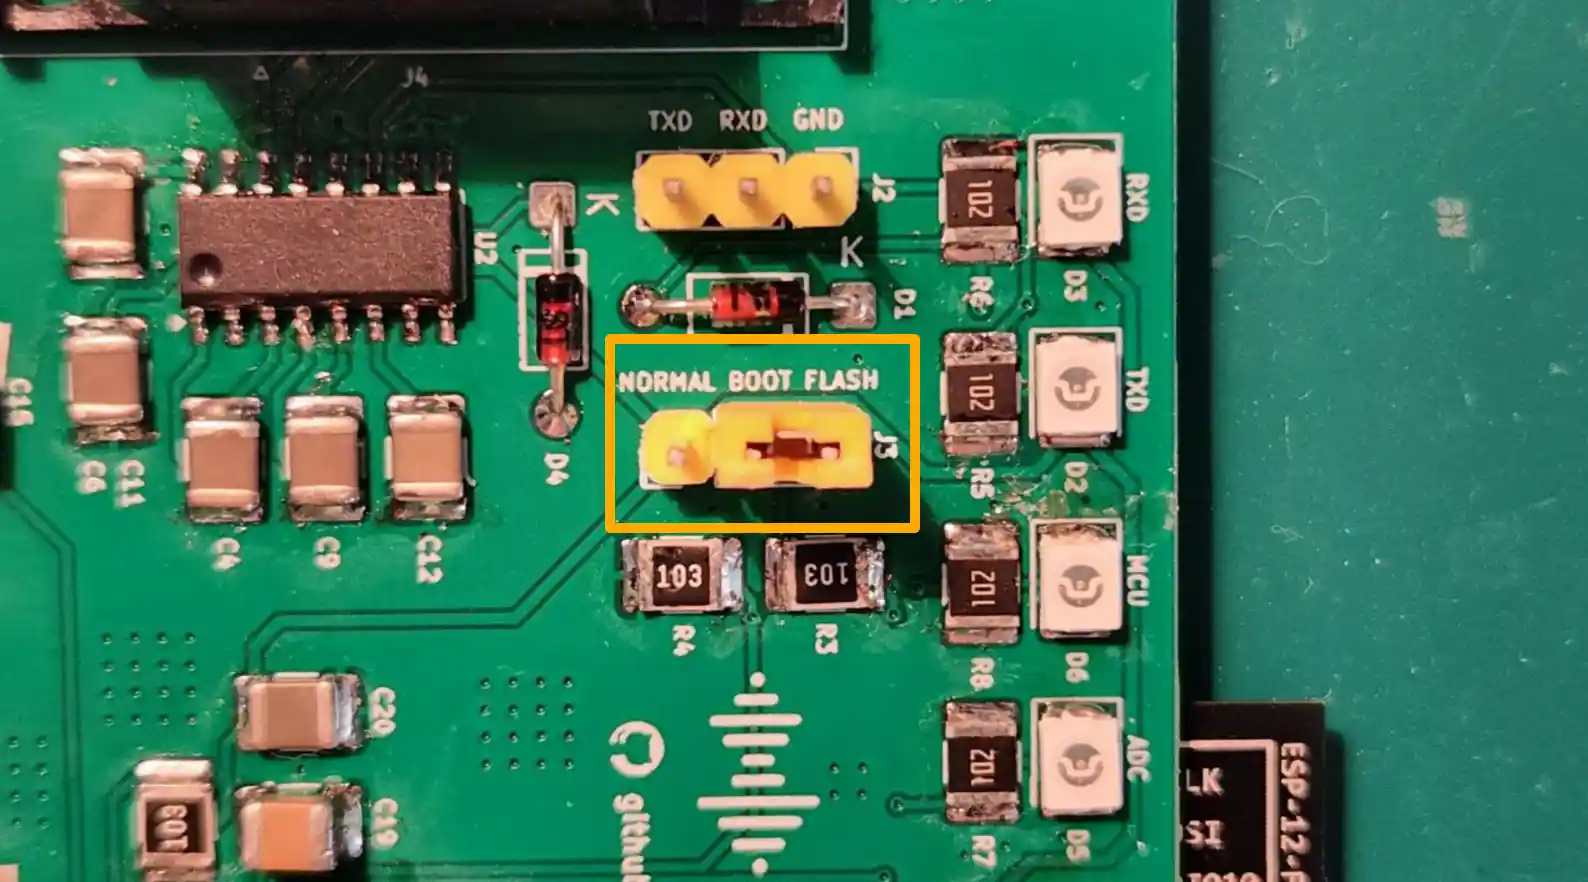
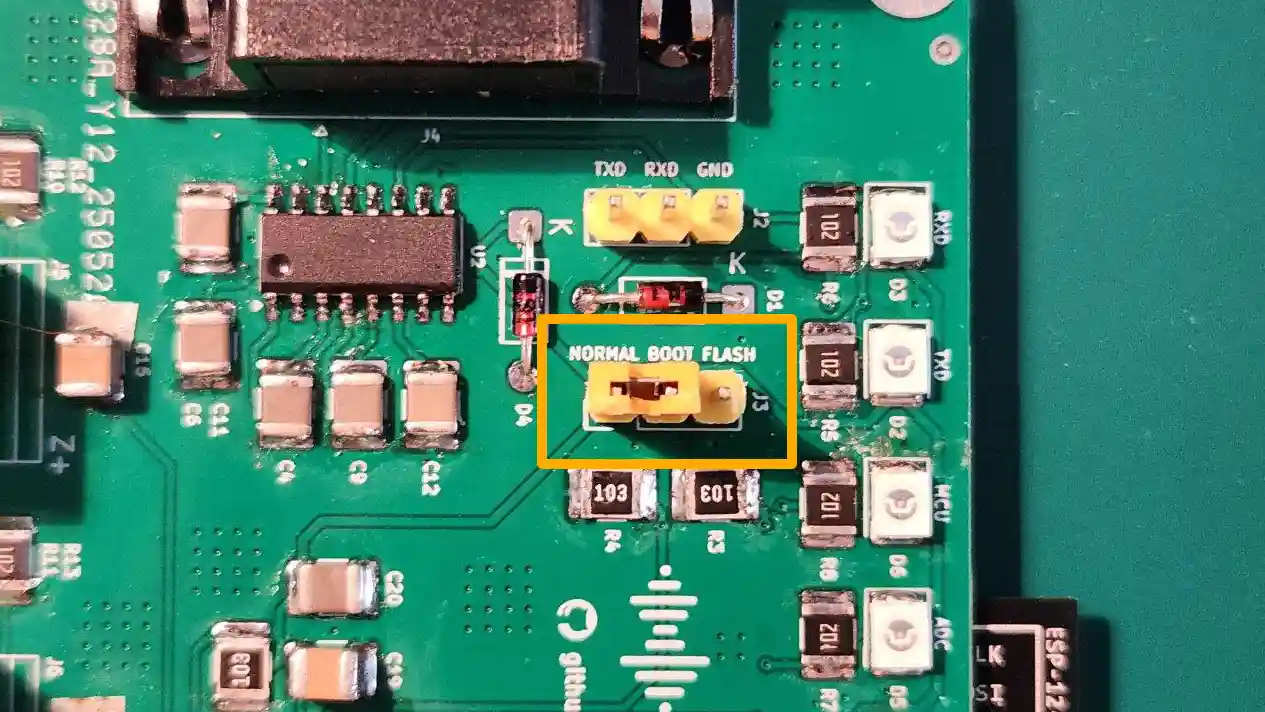
Set BOOT Jumper to Flash Mode
To begin the firmware upgrade, you need to switch the BOOT jumper cap to flash mode.
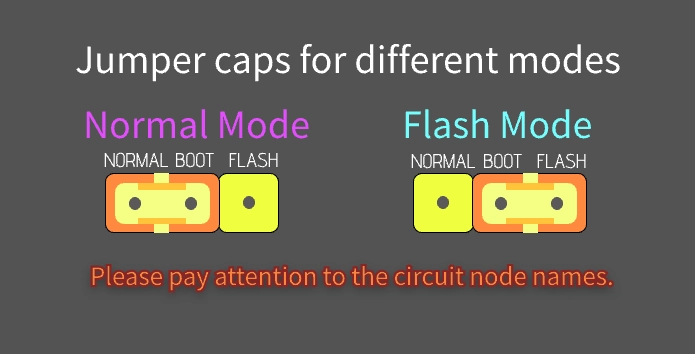
Move the BOOT jumper cap to the side labeled FLASH on the PCB.
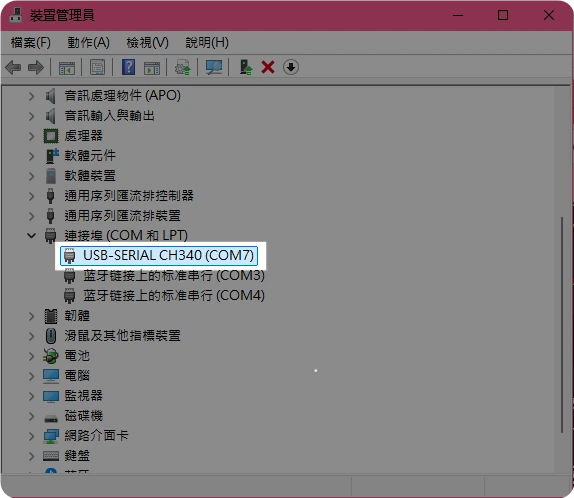
Connect E-D001 to PC
Connect the E-D001 board to your PC using an RS-232 to USB cable, and power it on.
To verify the connection:
- On Linux, run the following command. The serial device usually appears as
ttyUSB*orttyACM*.Where$ ls /dev/tty*
/dev/tty /dev/tty20 /dev/tty33 /dev/tty46 /dev/tty59 /dev/ttyS13 /dev/ttyS26
/dev/tty0 /dev/tty21 /dev/tty34 /dev/tty47 /dev/tty6 /dev/ttyS14 /dev/ttyS27
/dev/tty1 /dev/tty22 /dev/tty35 /dev/tty48 /dev/tty60 /dev/ttyS15 /dev/ttyS28
/dev/tty10 /dev/tty23 /dev/tty36 /dev/tty49 /dev/tty61 /dev/ttyS16 /dev/ttyS29
/dev/tty11 /dev/tty24 /dev/tty37 /dev/tty5 /dev/tty62 /dev/ttyS17 /dev/ttyS3
/dev/tty12 /dev/tty25 /dev/tty38 /dev/tty50 /dev/tty63 /dev/ttyS18 /dev/ttyS30
/dev/tty13 /dev/tty26 /dev/tty39 /dev/tty51 /dev/tty7 /dev/ttyS19 /dev/ttyS31
/dev/tty14 /dev/tty27 /dev/tty4 /dev/tty52 /dev/tty8 /dev/ttyS2 /dev/ttyS4
/dev/tty15 /dev/tty28 /dev/tty40 /dev/tty53 /dev/tty9 /dev/ttyS20 /dev/ttyS5
/dev/tty16 /dev/tty29 /dev/tty41 /dev/tty54 /dev/ttyS0 /dev/ttyS21 /dev/ttyS6
/dev/tty17 /dev/tty3 /dev/tty42 /dev/tty55 /dev/ttyS1 /dev/ttyS22 /dev/ttyS7
/dev/tty18 /dev/tty30 /dev/tty43 /dev/tty56 /dev/ttyS10 /dev/ttyS23 /dev/ttyS8
/dev/tty19 /dev/tty31 /dev/tty44 /dev/tty57 /dev/ttyS11 /dev/ttyS24 /dev/ttyS9
/dev/tty2 /dev/tty32 /dev/tty45 /dev/tty58 /dev/ttyS12 /dev/ttyS25 /dev/ttyUSB0/dev/ttyUSB0is the device you connected. - On Windows, open Device Manager and check under Ports (COM & LPT).
Setup PlatformIO
PlatformIO is an open-source embedded development environment used to build and upload firmware. To install PlatformIO, you need install Python and Visual Studio Code first.
After installing, you can open Visual Studio Code and click Extensions, search to install "PlatformIO" extension.
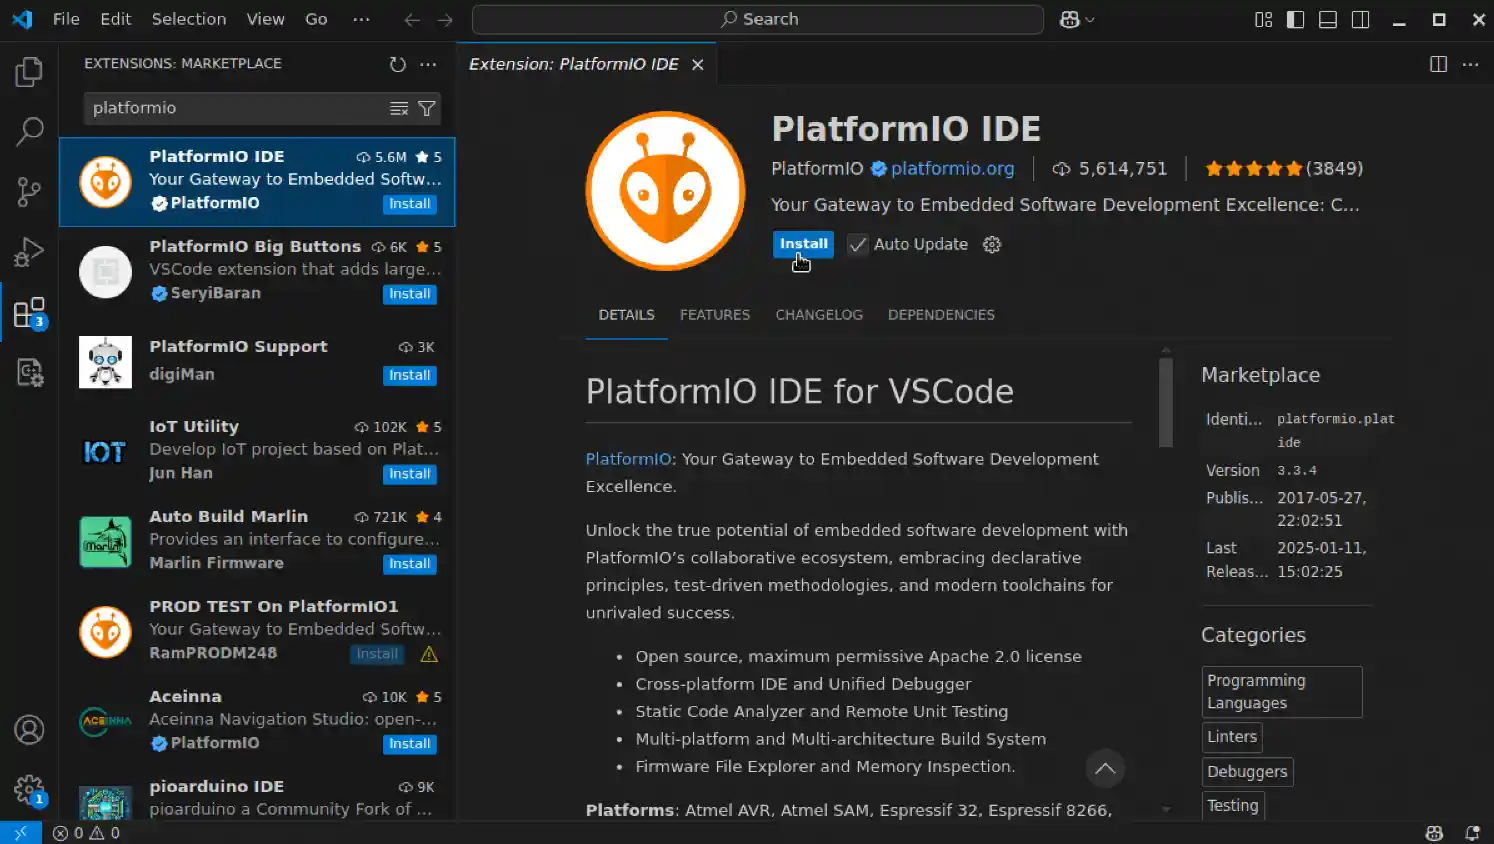
It usually takes a few minutes to install the extension. Restart Viaual Studio Code after PlatformIO installation for the extension to initialize properly.
Get Latest Firmware
The firmware source code for E-D001 is located in the v1 branch of the AnyShake Explorer GitHub repository, under the firmware/ directory.
To get source files, you need to clone the repository and checkout the corresponding branch.
If you have git installed, you can use the following command to clone the repository:
$ git clone --depth 1 -b v1 https://github.com/anyshake/explorer
Or get the latest project files using the following direct link, after downloading, extract the archive and locate the firmware directory.
- github.com/anyshake/explorer/archive/refs/heads/v1.zip
- github.com/anyshake/explorer/archive/refs/heads/v1.tar.gz
Open Firmware Project
- Press
Ctrl + K, O(orCmd + K, Oon macOS) - Select the
firmwarefolder inside the repository
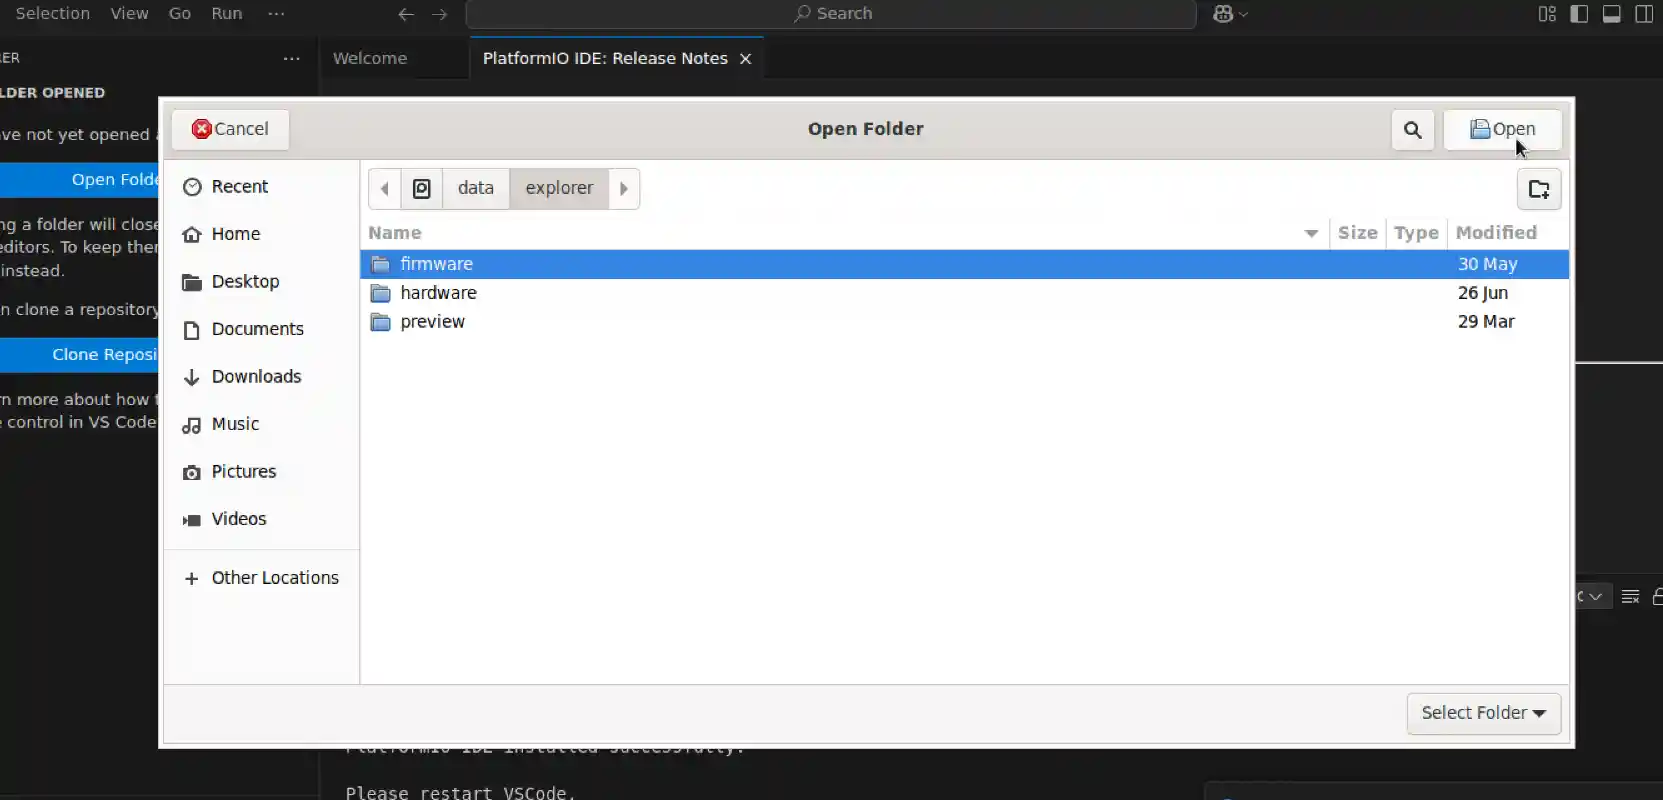
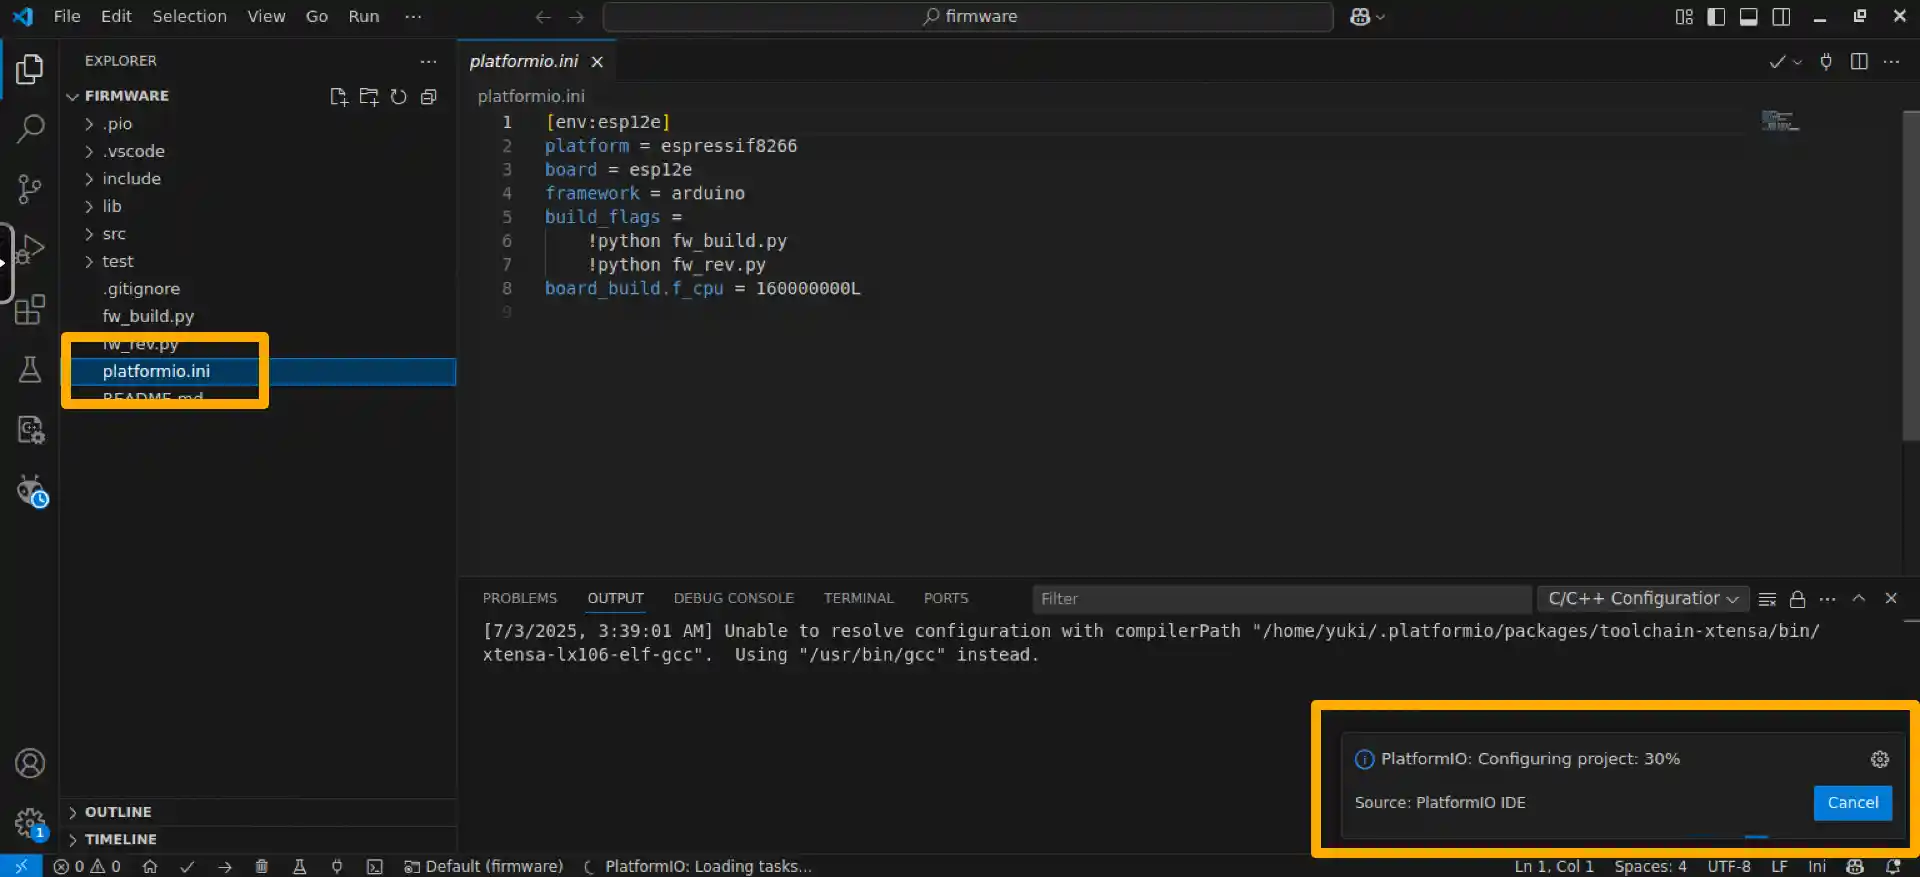
You should see the platformio.ini file in the root of the project. PlatformIO will automatically initialize the environment.
Build and Upload
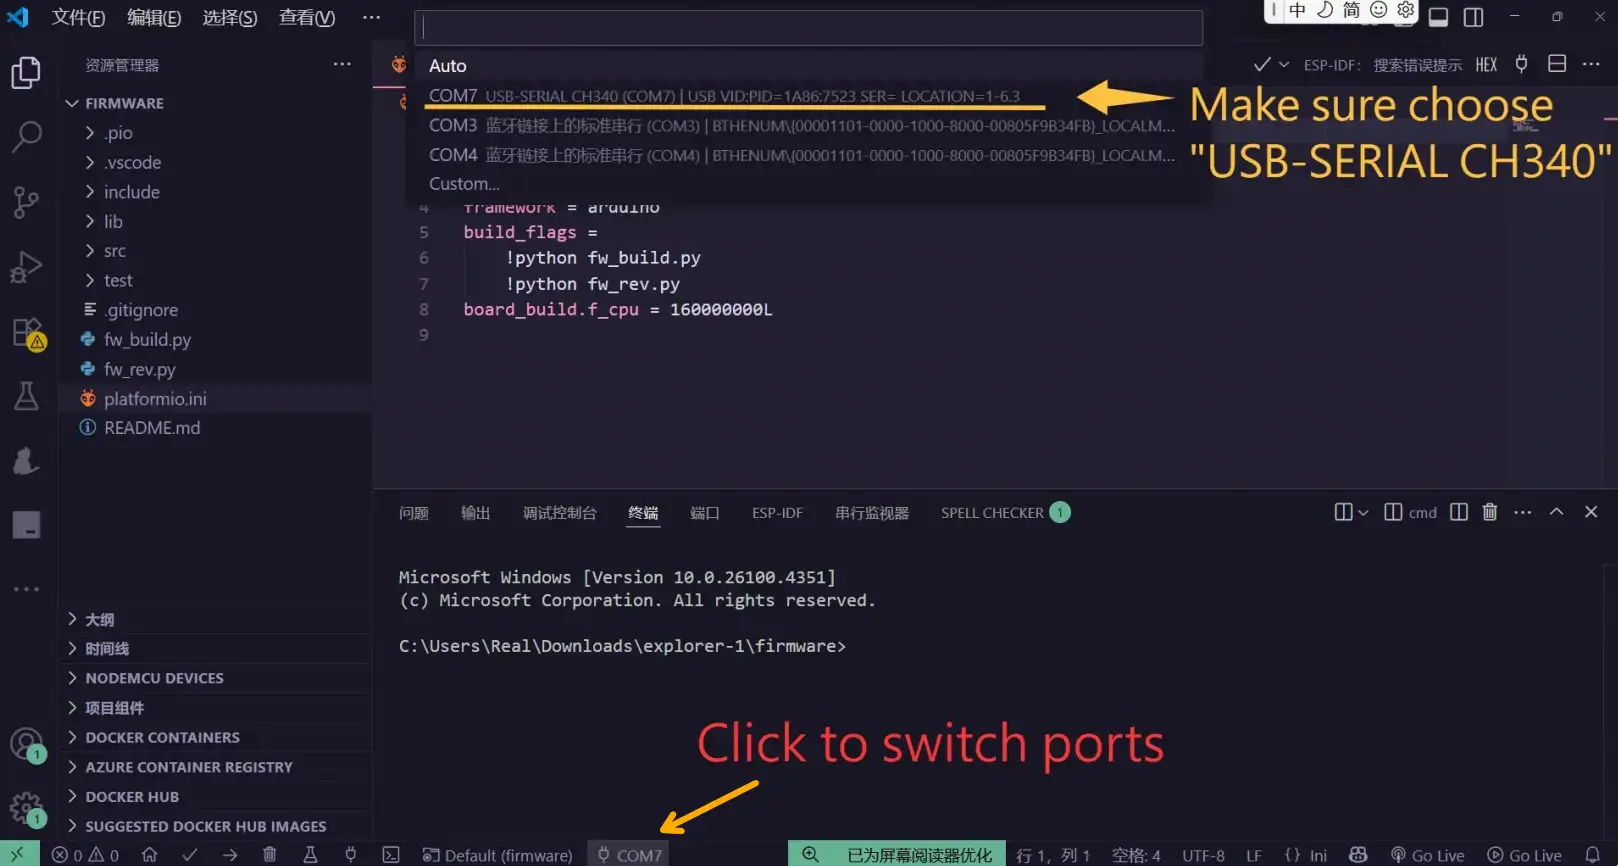
Select the correct serial port that you identified earlier.
Then click the Upload button in the PlatformIO toolbar to compile and flash the firmware.
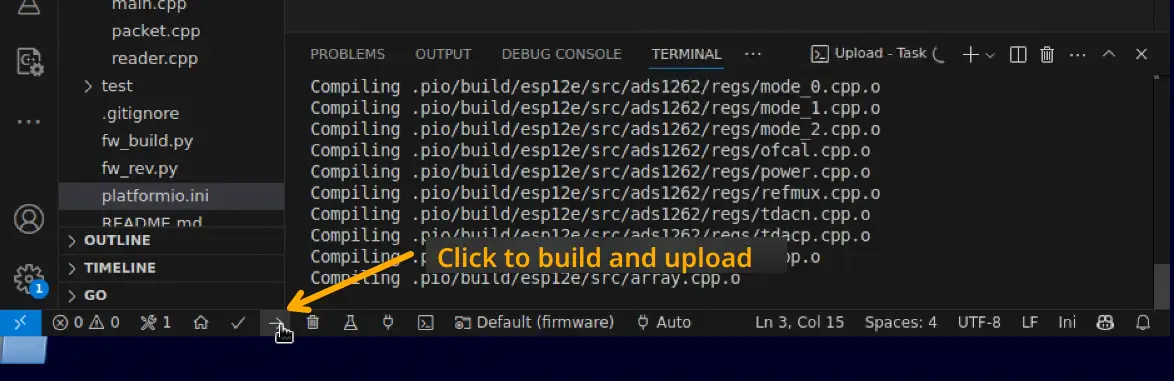
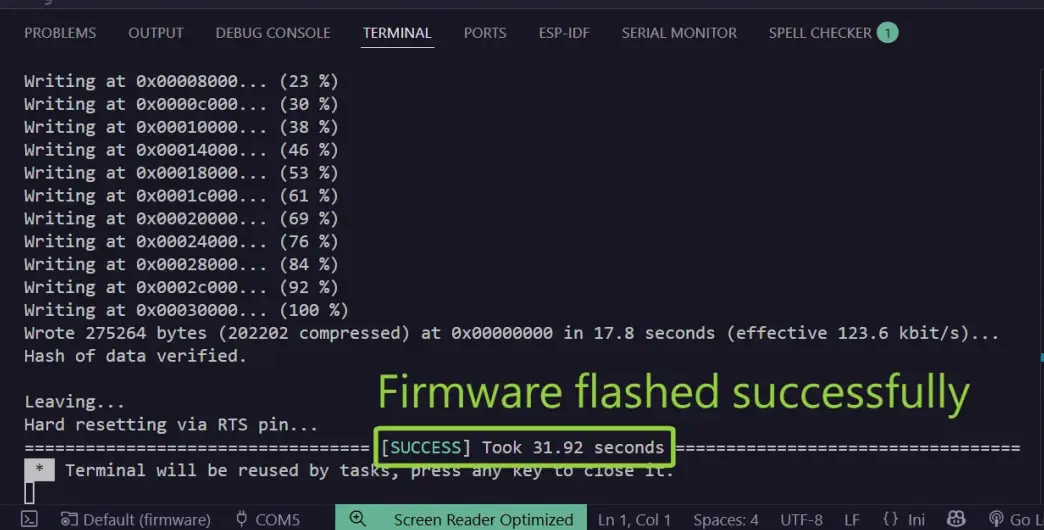
It usually takes a while to build firmware and upload to the device. If successful, you’ll see a confirmation message:
After Flashing
- Move the BOOT jumper cap back to normal mode.
- Press the Reset button on the E-D001 board.
Your device is now running the updated firmware and ready for use!