Installing Nexus
Before installing the AnyShake Nexus plugin, make sure SeisComP is correctly installed. This tutorial uses Debian GNU/Linux 11 (bullseye) and SeisComP 6.7.3.
To verify the installation, run the following command:
$ echo $SEISCOMP_ROOT
The terminal should return the SeisComP installation directory (e.g., /home/yuki/seiscomp). If nothing is returned, SeisComP may not be properly installed, and further investigation is required.
Get the Plugin
AnyShake Nexus provides precompiled binaries, available at GitHub Releases. Be sure to download the version that matches your operating system and system architecture.
To identify your system architecture, run:
$ uname -m
For instance, on a 64-bit system, this command returns x86_64, indicating an Intel 64-bit architecture. In this case, you should download the linux_amd64.tar.gz plugin archive.
Install the Plugin
First, extract the plugin archive to a directory of your choice. For example, here we extract it to /home/yuki/nexus:
$ tar xvf linux_amd64.tar.gz -C /home/yuki/nexus
The extracted archive contains the following files and directories:
install.sh– Installation scriptuninstall.sh– Uninstallation scriptseiscomp– Directory containing the AnyShake Nexus binaries
Next, change into the extracted directory and run the installation script:
$ cd /home/yuki/nexus
$ chmod +x install.sh
$ ./install.sh
If the installation completes successfully, you will see a confirmation message in the log output:
Installing AnyShake plugin...
sending incremental file list
./
etc/
etc/descriptions/
etc/descriptions/anyshake_plugin.xml
          2,387 100%    0.00kB/s    0:00:00 (xfr#1, to-chk=11/16)
share/
share/plugins/
share/plugins/seedlink/
share/plugins/seedlink/anyshake_plugin
      2,719,928 100%  648.48MB/s    0:00:00 (xfr#2, to-chk=7/16)
share/templates/
share/templates/seedlink/
share/templates/seedlink/anyshake/
share/templates/seedlink/anyshake/seedlink_plugin.tpl
            328 100%   80.08kB/s    0:00:00 (xfr#3, to-chk=4/16)
share/templates/seedlink/anyshake/setup.py
          1,509 100%  368.41kB/s    0:00:00 (xfr#4, to-chk=3/16)
share/templates/seedlink/anyshake/streams_e_c1x1g_3ch_acc.tpl
            488 100%  119.14kB/s    0:00:00 (xfr#5, to-chk=2/16)
share/templates/seedlink/anyshake/streams_e_c1x1g_3ch_vel.tpl
            484 100%  118.16kB/s    0:00:00 (xfr#6, to-chk=1/16)
share/templates/seedlink/anyshake/streams_e_c1x1g_6ch.tpl
            930 100%  227.05kB/s    0:00:00 (xfr#7, to-chk=0/16)

sent 2,727,478 bytes  received 192 bytes  5,455,340.00 bytes/sec
total size is 2,726,054  speedup is 1.00
AnyShake plugin installed successfully.
Restart SeisComP
After installation, restart SeisComP to apply the changes:
$ seiscomp restart
Once restarted, the AnyShake Nexus plugin will be available within the SeisComP interface.
Check the Installation
To confirm the installation, open the system configuration tool with the following command:
$ scconfig
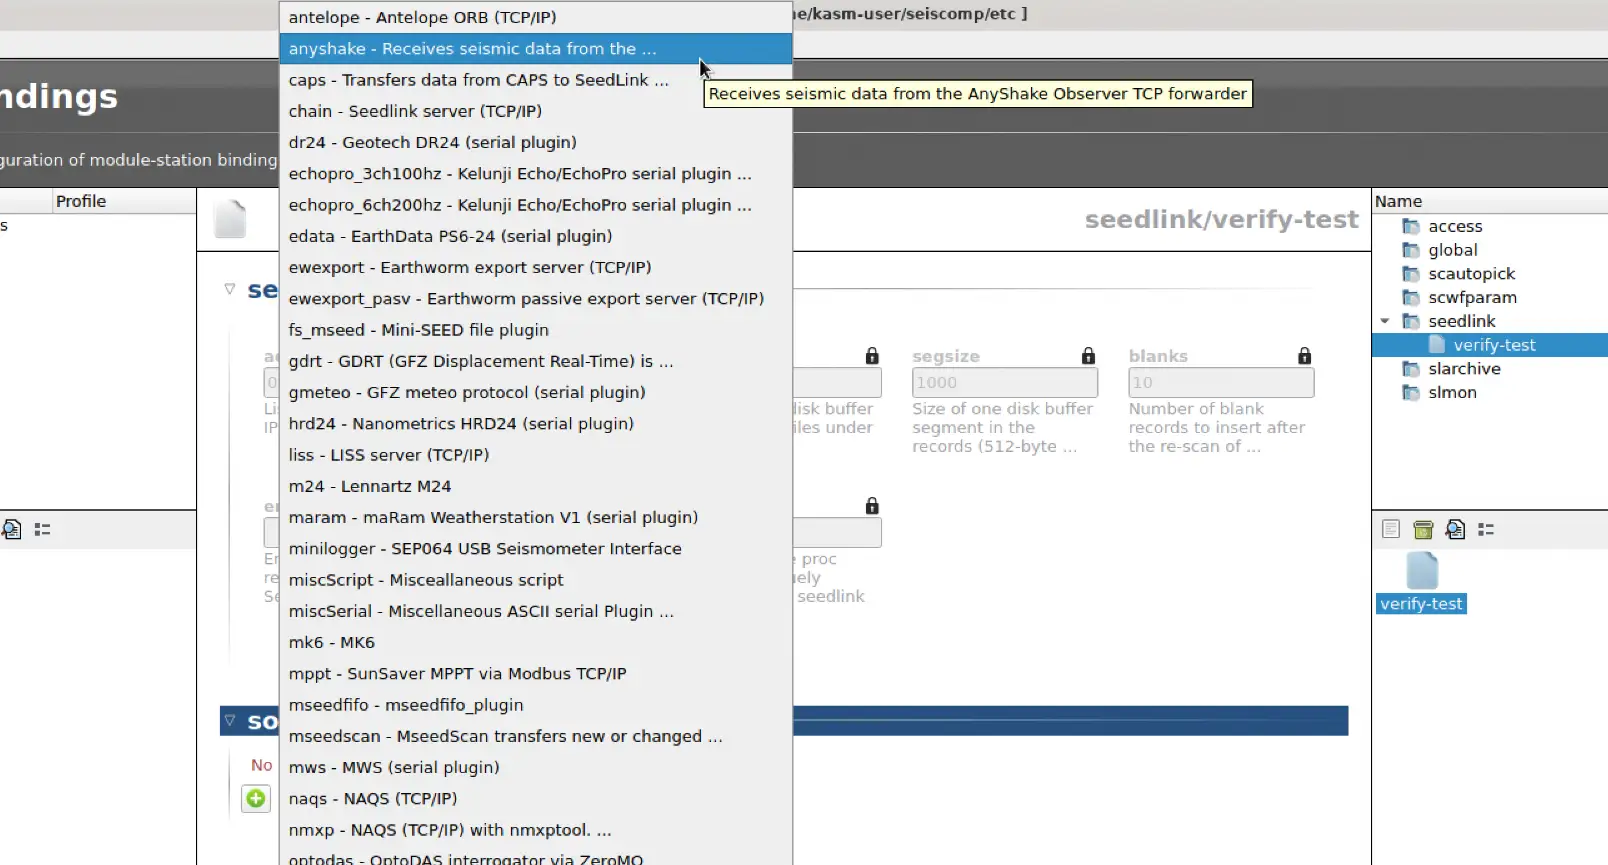
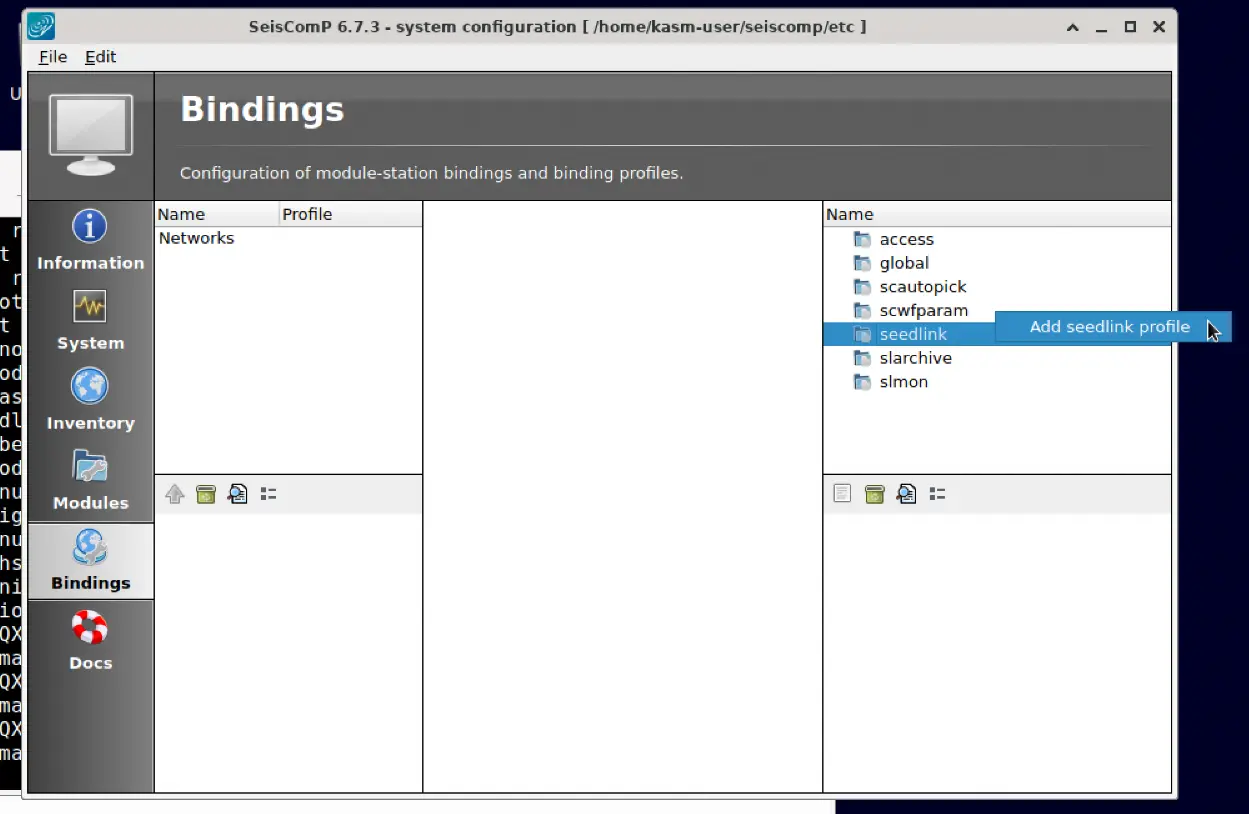
Navigate to Bindings and right-click on the seedlink item from the list in right-hand side, select Add seedlink profile.
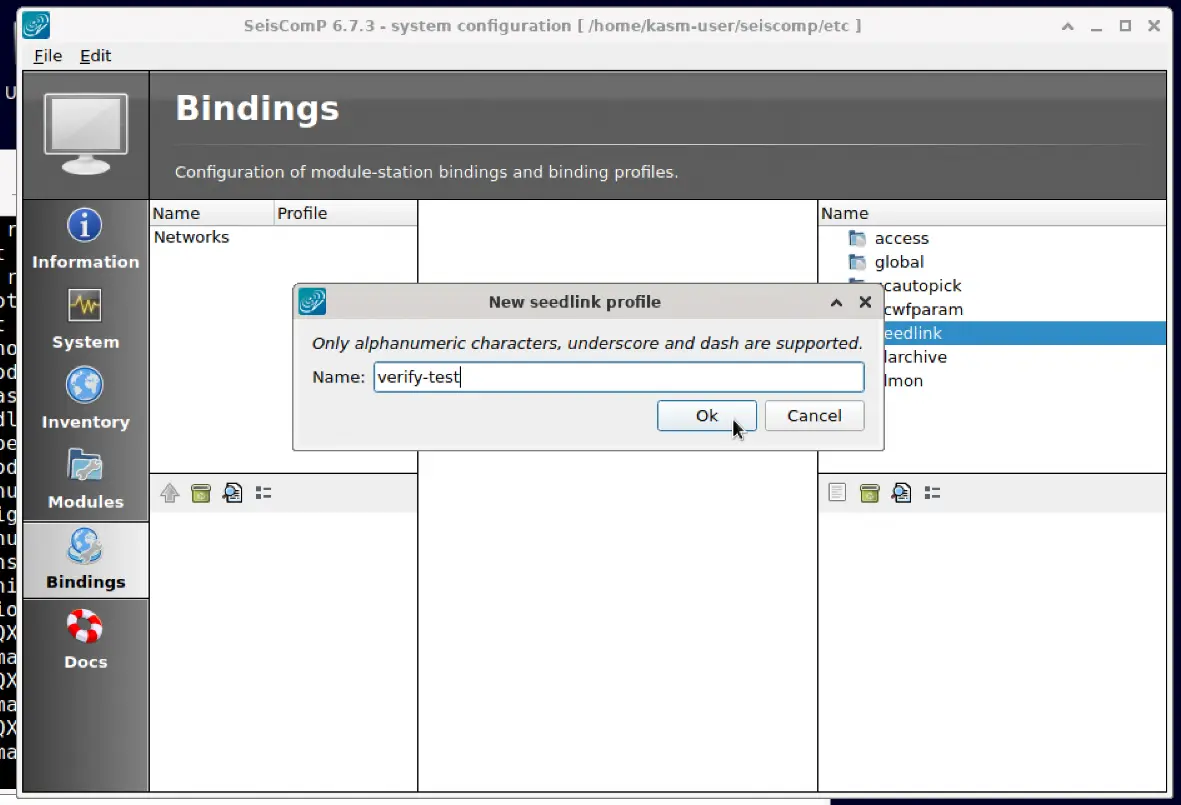
Set a name in the pop-up dialog and click OK:
Double-click the newly created profile. In the source tab, you should see a drop-down menu that includes the AnyShake Nexus option: